Author Archive

The League Newbie’s Starter Guide


One thing a new player will notice is a bunch of stuff in zone chat that may or may not make any sense at all. LFM rabid. LFM Mizgir. Things of that sort. Here is a short list of things you’ll see in zone chat in the first two or three zones on the League side, and answers to some other common questions seen in zone chat:

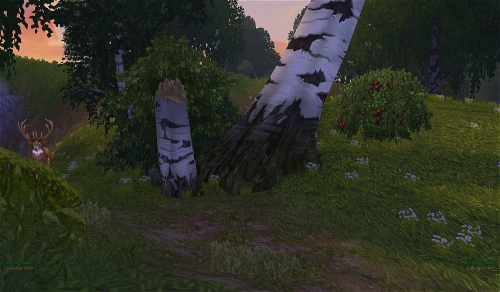
Where can I find birch scrolls? You will find them on the trees that are broken off. They are hard to find, that much is true, but don’t confine your search to just the area around the quest marker on your map. The birch trees are all over wherever the forest is not thick. The thick, dark forest will not have any.

What are the medicinal plantains for? Gather these to turn in for reputation and get blue gear. This is worth doing before you leave. See the Survivors reputation guide.

LFM DS: Looking for More, Damned Soul. You’ll see this on Evermeet Isle. Damned Soul is a raid boss, and the quest gives really good blue gear for rewards. The mob kill itself also has good xp. You must be level 6 in order to get the quest and be sure you do it before you leave the isle!

LFM rabid (or rabid squirrel, rabid sabertooth squirrel): This is the first raid boss you will be able to kill in Lightwood. You must be level 8 to receive the quest, A Cure for Rabies.

LFM Mizgir (or Arachnaphobia): Mizgir is the second raid boss in Lightwood, a giant, nasty spider. You must be level 10 in order to get the quest, called Arachnaphobia.

What happens if I die while killing a raid boss? Two options. You can ask your raid to hold off on DPS and give you time to run back (but you’ll have to get a hit in on it before it dies or you won’t get credit), or you can simply not release. If you don’t release, you will still get credit when it dies.

LFM Oreshek (or Oreshek Fortress): This is the instance for Lightwood, and you must be level ten in order to receive all of the quests for the instance. The drops in here are pretty impressive. Party only! You can not take a raid into Oreshek. One other thing to note is that the mobs don’t respawn in here. If you somehow are not able to complete the quest to escort the elf to the entrance, he will reappear where you first saw him and you will be able to go back and complete the quest.

Where is the treasure? The treasure in Evermeet is easy to find, since a quest takes you right to it. The treasures in Lightwood are a little harder. Check out this guide to finding the two chests in Lightwood.
Novograd Times Reaches 100,000 Hits!


CONGRATULATIONS NOVOGRAD TIMES!

Today, the Novograd Times reached 100,000 unique hits, and before the game has even gone live!

Ashkir and the rest of the staff of the Times would like to thank our readers for reading, commenting, and suggesting, and the staff of Allods Online for making the game great enough that people want to read about it on this blog.

We wouldn’t do it without you, and here’s to another 100,000 hits to come!

Finding the Treasure in Asee-Teph


This guide is going to be very general, since both factions get to partake of this treasure. Do be careful, there are other players and level 25-26 elementals that are out to get you!

Go to Asee-Teph, of course. Start walking (or flying) towards this location:

Now, find the glowy spot in the area, like so:

You’re close! You should see the repeatable marker on your screen, the treasure is very near this spot. Here we are!

There it is! Be careful of the elementals, they are not friendly. Your faithful, brave reporter endured several deaths at the hands of elementals in order to bring you this helpful guide. Thank you to the cleric Blyss, wherever you are, for killing them! This is a mithril chest, enjoy!

Christmas Event Guide


Christmas has come late to Allods this year! Through the end of closed beta test #4, Father Winter and his assistant, the Snow Maiden, will be hanging out in Novograd and Nezebgrad.

Father Winter and Snow Maiden in Nezebgrad!

Father Winter and Snow Maiden in Novograd!

Speaking to Father Winter will let you take his two quests. One to throw three snowballs, and you do this by right-clicking them in your inventory. You can throw them at players or NPC’s, knock yourself out! The second quest is to plant 7 trees around the city. Unfortunately, the game seems very picky about where you plant them, so it takes trial and error to get them planted. Each of these quests gives you 1,000 reputation for the Holiday Council. Once you’ve finished these two quests, Father Winter offers you a repeatable quest to place five trees, five snowmen, and five holiday garlands around the city, for 250 reputation.

What do these things do? Right clicking a tree will grant you a holiday present that you can open for random loot. Right clicking a snowman gives you snowballs, which you can throw at other players, with a small chance of getting a present. The holiday garlands (which look like candy canes with lights on them) are for something else entirely. Opening holiday gifts has a chance to give you the Greedy Father Winter buff, with a one hour timer. You know you have it when you look like either a snow maiden or Father Winter. Female toons get the bag on their back and a tiara. Male toons will have the bag and a santa hat and beard.

There’s an upside and a downside to this buff. While you have this buff on, you can interact with the holiday garlands. Eventually one of them will give you seven presents and the buff will disappear. On the downside, while you have the buff on, you will be hunted. If you are hit by 10 snowballs you will drop a pile of presents and be forced to run around aimlessly for several seconds, while wearing a snowman head. During which time people will be able to come up and steal all your presents! So destroy the holiday garlands as fast as you can to get your seven presents and lose the buff! Here’s our esteemed editor sporting his snowman head, and take note of the pile of presents he dropped!

What do you get? Presents have the chance to give you several things. You can get casual garments to play dress up with, either in blue or in red. You can get random treats like champagne, candy, or mandarin oranges. You can also get gear. Any of the reputation gear the Snow Maiden offers you can be received from a holiday gift. The reputation gear are various pieces at level 8, 18, 28, and 38.

Basic Alchemy Tutorial


Alchemy is one of the professions that has a slight learning curve. Once you understand what’s going on, it’s cake! This tutorial will explain what’s going on so that you can go on to be a master alchemist. I suggest having an herbalist alt or a friend who is an herbalist, or else you’ll need to depend on the auction house and it won’t always have exactly what you need.

First, you will go to your alchemist trainer, whether he be League or Empire. Trade with him and buy the following items: Alchemist’s Training Manual, Shoddy Flask, and 2 basic solvents, as pictured below.

Right click on the training manual in your inventory and then click Accept but only if you’re sure you want to learn Alchemy! You’ve now learned Alchemy and you’re ready to get started. Right click on the shoddy flask in your inventory to bring up the alchemy window, like so:

You’ll see your alchemy level in the upper right corner, you can also find your level by hitting I then clicking the Professions tab at the bottom of the character window. At the bottom of the alchemy window, you’ll see a button labelled Recipes. Click on it to see what you’re capable of making. It looks like this:

Notice that at level 1, you can make Stain Remover, and take note of the two symbols. Two eyeballs, right? Now take note of the eyeballs here:

Each alchemy ingredient has a certain set of symbols associated with it. You must match up the symbols of your recipe with the symbols of your ingredient. Since we need two eyeballs, right click on the basic solvent twice to place it into the two vials in your alchemy window. It’ll look like this:

Your two ingredients are now in the two vials and the Boil button will now be clickable. Click it to boil your potion! Boiling a potion looks a lot like a slot machine. One or both rows of symbols will spin and stop at a random place. If you fail you’ll receive a Strange Mixture which does nothing and is worth only 4 copper. But all is not lost! You may make corrections. Up to level 94, you may make one correction to try and get a good potion. In order to do this, click the arrows at the top and bottom of your vials:

See the Strange Mixture over there? Now, use your one correction by clicking to move the second vial either one space up or one space down to align a second eye symbol and get a success!

Click on the potion at the right and a loot window will pop up. Collect your potion from the loot window, and the alchemy window will reappear, ready for another potion. Now we’re going to play with herbs! If you glance at your recipe window, you’ll see that at level 2 you may make a potion of speed and it requires a different symbol, and an eye, which you get from Basic Solvent. The first herb you’ll work with is St. John’s Wort, so make sure you have some, or you can use the Stain Remover to level yourself up a little more. Ready for potions of speed? Let’s get started. Right click on your shoddy flask and now we need the right ingredients.

St. John’s Wort happens to have the same symbol as is needed in your recipe. Place St. John’s Wort in your first vial and place Basic Solvent in the second and click Boil. If you’re lucky, you’ll get a success!

Success! But if it isn’t a success, do your best to use your one correction to fix it. Unfortunately, there are times when you can’t save the potion, no matter what. That’s the risk of alchemy. At level 94, you’ll be ready to move on to the basic flask, which has three vials, and you then get two corrections rather than one. Also, your recipes will need three matching symbols. Use what you learned in your first 94 levels to advance. You now have all the knowledge you need to power your way to master alchemist. Enjoy! ❤